Migration From X12ARIMA to X-13ARIMA-SEATS
This tutorial outlines the steps to migrate existing X12ARIMA models to the latest
X-13ARIMA-SEATS model.
1. Select the X12ARIMA Model
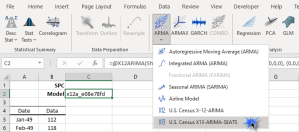
In your workbook, select the cell where the X12ARIMA model is stored in your workbook. The cell will have a value beginning with “x12a_” and a formula that starts with an X12ARIMA(.) function.
For this tutorial, I chose the following model:
2. Launch X-13ARIMA-SEATS Wizard
To start the model migration, locate the ARMA icon, click on it, and select X-13ARIMA-SEATS
from the drop-down menu.
3. Examine the X13ARIMA Settings
The X-13ARIMA-SEATS Wizard processes the X12ARIMA model and maps its settings
(e.g., Input Data, Date Start, Transform, X11, ARIMA) into the equivalent settings
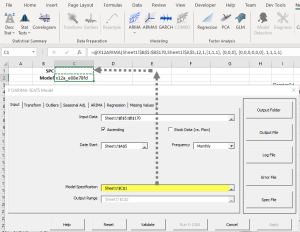
in X13AS. First, we need to select an empty cell to store the SPC settings.
Next, examine the X13ARIMA settings in the Input tab: verify the Input Data cell-range, Date Start, and Frequency. Press the Validate button to examine the model settings consistency and ensure that no error pops up.
Transform
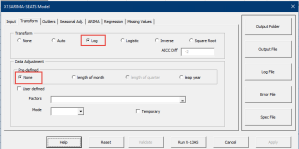
Select or switch to the Transform tab. The transform function (i.e., log) should match the settings in the X13AS model.
Outliers
Select or switch to the Outliers tab and examine its settings. In our X12ARIMA model example, none of the Types are selected.
Seasonal Adjustment
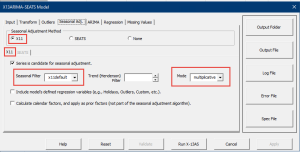
Now, switch to or select the Seasonal Adj. tab. X12ARIMA supports only one Seasonal Adjustment Method: X11.
ARIMA
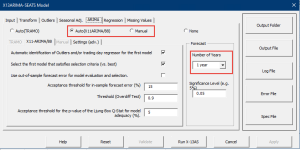
Now, select the ARIMA tab and examine its settings. The X12ARIMA support either the Auto(X11ARIMA/88) model selection or Manual.
Regression
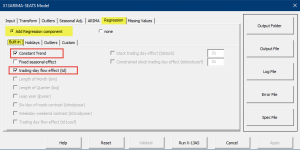
Finally, select the Regression tab and examine the built-in variables:
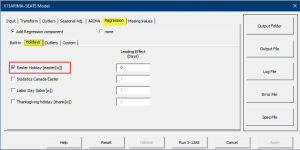
Change the inner tab to Holidays.
4. Execute the X13AS Program with the Model
Press the Run X-13AS command button to launch the U.S. Census X13AS program with the new model and generate the different output files.
Error File
Press the Error File control to launch the notepad application with the X13AS error file loaded. Examine the content for any warnings or notes.
Output File
Press the Output File command button to launch the notepad application with the X13AS output file loaded. The output is a large file, so scroll down and familiarize yourself with its different sections.
5. Finalize or Commit the Migration
When you are comfortable with the imported settings, click the Apply command button. The X13AS Wizard will re-write the formula and generate the SPC string in the designated cells in your workbook.
Upon completion, the model’s cell will display a text value starting with “x13as_”.
- NumXL does not write any changes into your workbook until you click the Apply command button. So, if you click Cancel, all your changes will be lost.
- In the X13AS Wizard, if you wish to restore the model to its initial state (when you first launched it) and undo your changes, Click the Reset button.
- Once you export/migrate the model into X13AS(.), we can’t restore or undo the changes, so you may wish to keep a backup of your workbook.
6. Update Formulas of Dependent Cells
First, let’s locate all cells in your workbook that reference the model’s cell in its formula. To do so, let’s use Excel’s Trace Dependents feature:
- Select the X13AS model’s cell
- Select or switch to the Formulas tab in the toolbar
- Locate and click on the Trace Dependents icon.
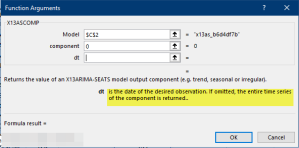
Now, edit the formula of the cell (at the end of the arrow), and replace X12ACOMP(.) with X13ASCOMP(.) and X12AFORE with X13ASFORE(.).
Furthermore, the X13ASCOMP and X13ASFORE use a date argument to reference the target period, so you need to replace the offset calculation in the older X12ACOMP and X12AFORE with actual serial date number values.
The U.S. Census X-13ARIMA-SEATS software is only available on 64-bit Windows machines. For more information, please consult this article: X-13ARIMA-SEATS Compatibility with 32-bit Windows.

